Work Items
Click here to view the Work Items overview video.
Purpose/Overview
Navigation Path:
Things to Know:
- Work Items appear alongside tickets in the Tasks Summary view.
- Work Items can be created as standalone records or generated directly from an existing ticket.
- Information from a ticket can automatically populate the associated Work Item when created from a ticket.
- Work Items support photo capture, comments, attachments, and other field activities through the mobile application.
- Work Items can be viewed and managed from both the task list and map views.
Key Benefits/Use Cases:
Field Data Collection
- Capture work information directly from the field.
- Reduce paper-based processes.
- Record updates in real time.
Work Management
- Create and manage work independently of a ticket when needed.
- Track field activities from a mobile device.
- Maintain consistency between office and field operations.
Ticket-to-Work Item Workflow
- Convert tickets into actionable Work Items.
- Automatically carry relevant ticket information into the Work Item.
- Simplify the process of assigning and completing field work.
How It Works:
Viewing Work Items
- Open the Irth Mobile app.
- Locate the Work Item within the task list.
- Select the Work Item to view its details. Work Items are identified with a dedicated Work Item icon and appear alongside tickets in the task list.
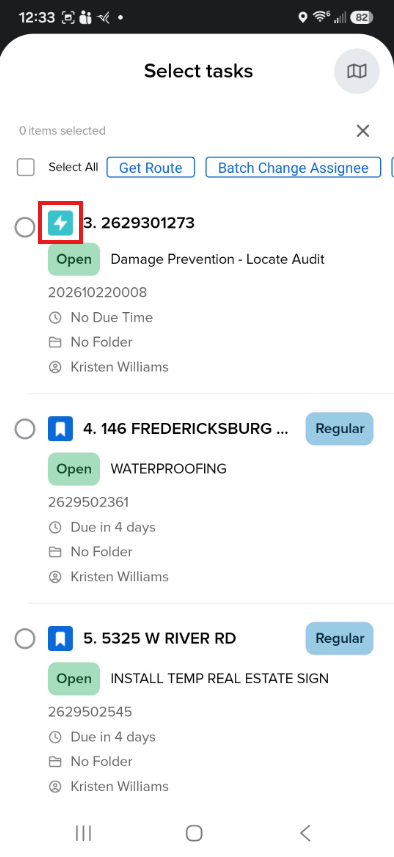
Creating a Work Item from a Ticket
- Open a ticket from the Tasks list.
- Select the ellipsis on the Action Bar.
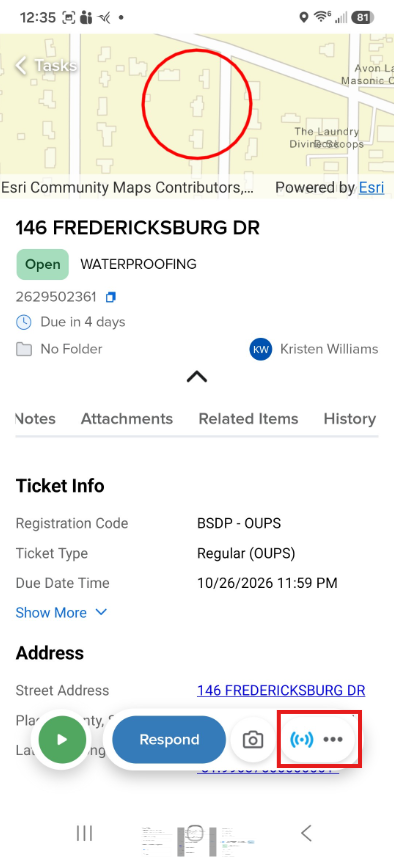
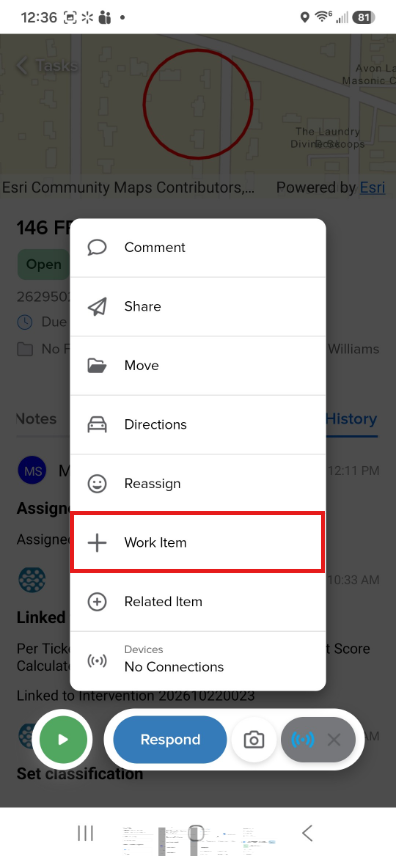
- Choose Work Item.
- Select the desired Work Item type.
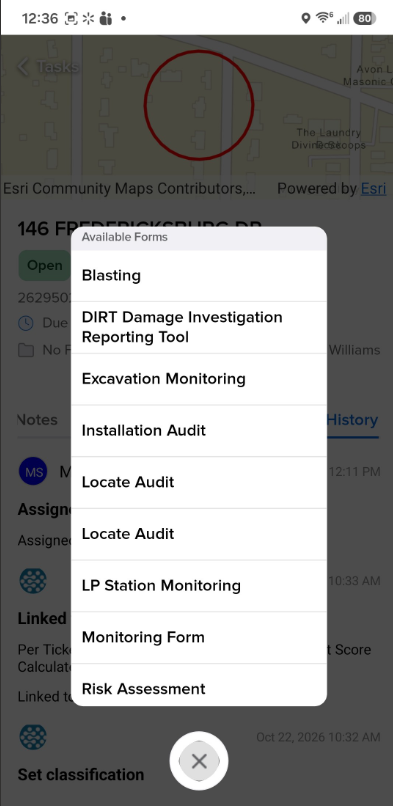
- Complete the required form fields.
- Save or submit the Work Item as needed. Ticket information may be copied into the Work Item automatically.
Creating a Standalone Work Item
- Open the Tasks screen.
- Tap the ellipsis.
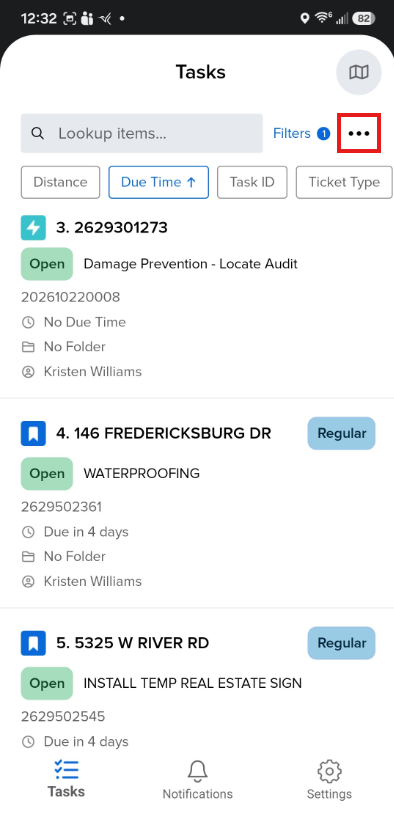
- Choose Work Item.
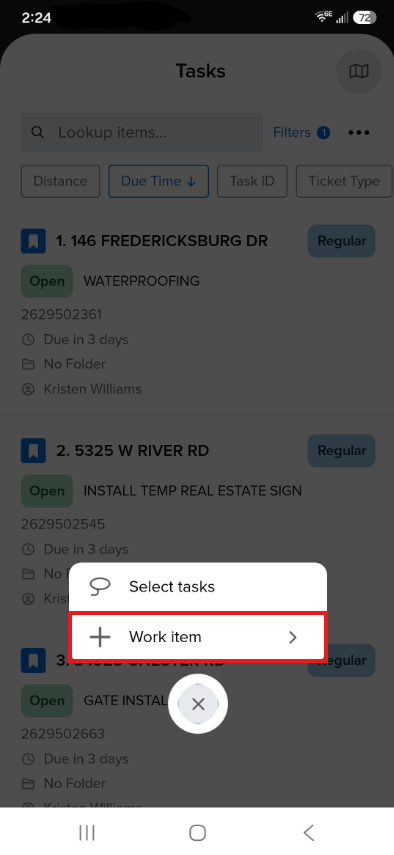
- Select the appropriate Work Item type.
- Complete the required fields.
- Save or submit the Work Item.
Viewing Work Item Details
After opening a Work Item, users can review information such as:
- Event details
- Contact information
- Work status
- Notes
- Attachments
- Related records
Available information may vary depending on the configured Work Item type and workflow.
Using Work Item Actions
Work Items support several actions that allow users to manage work while in the field, including:
- Comments
- Sharing
- Moving records
- Directions
- Messaging
- Viewing related items
Available actions may vary based on permissions and workflow configuration.
FAQ/Troubleshooting:
Q: Can I create a Work Item without a ticket?
A: Yes. Work Items can be created as standalone records directly from the Tasks screen.
Q: Can I create a Work Item from a ticket?
A: Yes. The mobile app allows you to create a Work Item directly from an existing ticket.
Q: Will ticket information be copied to the Work Item?
A: When a Work Item is created from a ticket, linked ticket information can be copied into the Work Item.
Q: Where can I find my Work Items?
A: Work Items appear within the Tasks Summary alongside tickets and can also be accessed through the map and task views.
Q: Can I add photos and attachments to Work Items?
A: The mobile workflow supports photo and field activity management. Availability may depend on your organization's workflow configuration
Questions? Contact us!

Was this article helpful?
That’s Great!
Thank you for your feedback
Sorry! We couldn't be helpful
Thank you for your feedback
Feedback sent
We appreciate your effort and will try to fix the article